ExeFS Modding Guide
Introduction
There are a few main components to exefs modding that you will need to have at least a basic understanding of.
- Using Ghidra/IDA to research
- ARM opcodes
- Using ExLaunch to compile C++ code
The basic format is to use ghidra to find an offset where we want to inject custom code. We then write C++ code and build it using ExLaunch. This then gives us ExeFS files we can install on our switch or emulator.
Setup
Building
The ExLaunch template has build options for atmosphere, yuzu, ryujinx and modmanager. When you build for any of these targets it will output files and folders in the correct directory structure to be dumped into the mods folder. The two actual files that get built (main.npdm and subsdk9) are the same no matter which of the targets you build, so generally it doesn't really matter as long as you know where to put them.
Building with the command prompt
To build your mod files manually through the command prompt, there are a few commands to run. They are detailed below.
# Configure the cmake project
cmake -G "Unix Makefiles" -DCMAKE_BUILD_TYPE:STRING="Debug" -DCMAKE_INSTALL_PREFIX:PATH="out/install/WSL-GCC-Debug" -DCMAKE_TOOLCHAIN_FILE:FILEPATH="cmake/toolchain.cmake" -Bbuild

# Move to the build directory
cd build

# Build the target you want. Replace <target> with your target.
make RomBase_release_<target>

# Optional: Export the built failes as a zip. Replace <target> with your target.
make RomBase_zip_<target>

# Optional: Send to the Switch using FTP. Replace <target> with your target (Only supports atmosphere and modmanager).
make RomBase_ftp_<target>
To build for another target simply replace <target> with your build target e.g., atmosphere
make release_atmosphere
Building with CLion
I generally recommend using CLion for writing code on ExLaunch over something like Visual Studio Code as the latter has trouble with the way hooks are defined (and C++ in general, really).
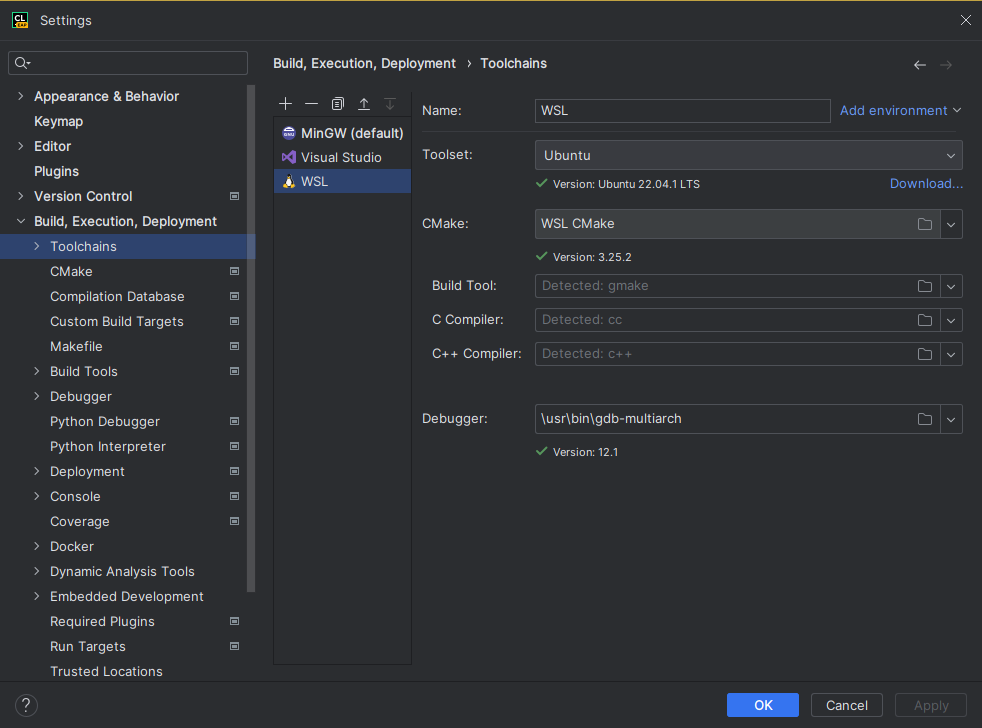
Your toolchain settings should look like this:

- Toolset should be set to your WSL instance.
- CMake should be set to WSL CMake.
- The rest should generally be left as-is unless you know what you're doing.
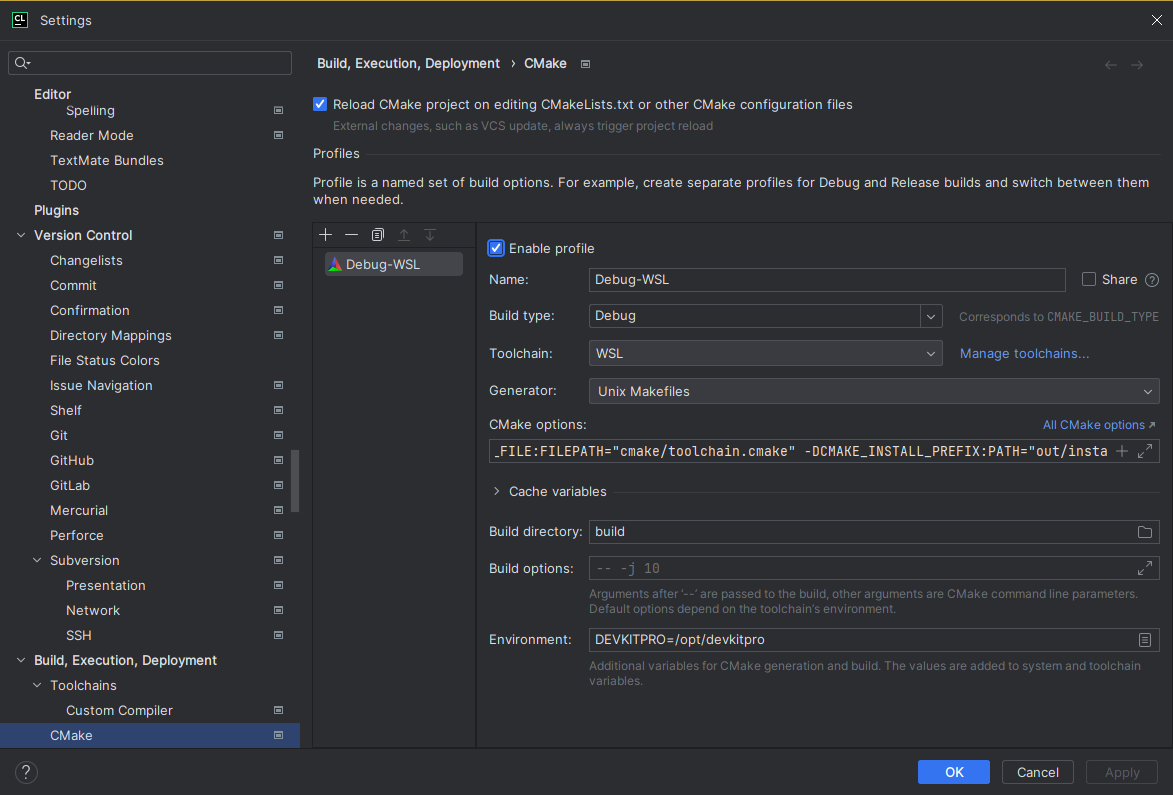
Your CMake profile settings should look like this:

- Build type should be set to Debug.
- Toolchain should be set to WSL.
- Generator should be set to Unix Makefiles.
- CMake options should be the following:
-G "Unix Makefiles"
-DCMAKE_TOOLCHAIN_FILE:FILEPATH="cmake/toolchain.cmake"
-DCMAKE_INSTALL_PREFIX:PATH="out/install/WSL-GCC-Debug"
- Build directory should be set to
build. - Environment should be set to
DEVKITPRO=/opt/devkitpro. - The rest should generally be left as-is unless you know what you're doing.
After this is set up, building is very easy!
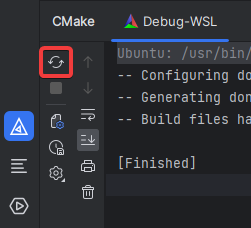
In the CMake menu in the bottom left, click the "Reload CMake Project" button:

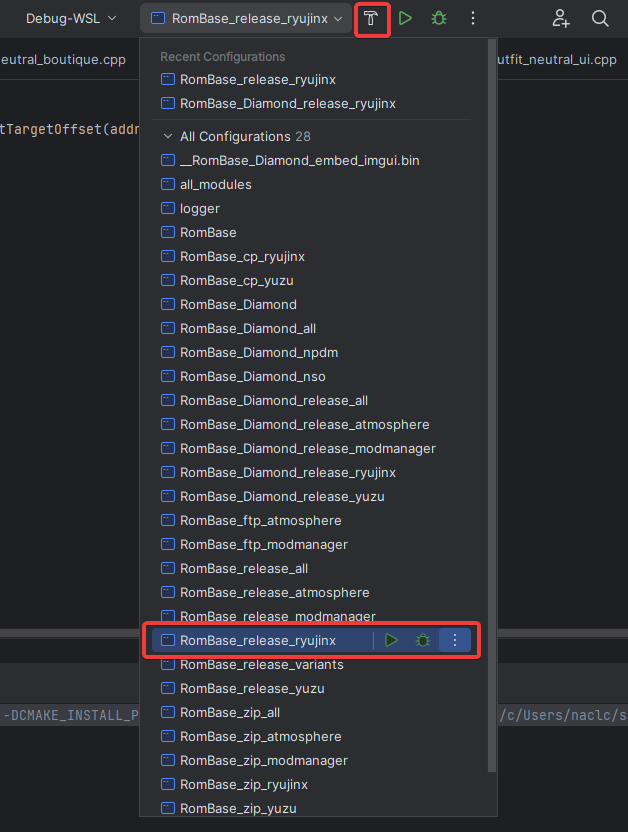
Once it's reloaded, you can select the target you'd like to build from the dropdown menu at the top and click the "Build" button.

Example Usage
Let's go through an example of disabling the disobeying mechanic.
This patch already exists in src/mod/features/badge_check.cpp if you're looking at the Luminescent fork. For demonstration purposes we'll add it as its own patch. Always make sure you're not duplicating existing hooks when creating patches!
-
Set up your development enviroment as above.
-
Use Ghidra to find the offset to a function where you want to inject your custom code. This is probably going to be the hardest part, we need to look through the code and find the relevant location for our injection.
- Lets open ghidra and search through the functions using the Symbol Tree on the left sidebar.
- Just from messing around in the files we know
Dpris where most game functions are. Within this we know disobeying is a battle mechanic so let's look underDpr.Battle.Logic. - After a bit of searching around we find a function in the
MainModulecalledDpr.Battle.Logic.MainModule$$GetMaxFollowPokeLevelwhich returns auint8_t. This looks like the function that returns the max obeying level, so let's assume it is and test it. - The function starts at the adress of
71020349e0, which equates to an offset of020349e0.
-
Add your new feature to the
src/mod/features/features.hheader file and call it from main.- Let's add our new feature and call it
disobeying. Usually the function names that we use are prefixed withexl_and suffixed with_main.
src/mod/features/features.h// Removes the disobeying mechanic.
void exl_disobeying_main();- Add a call to this function in
exl_feature_main()insrc/mod/features/main.cppto enable our patch.
- Let's add our new feature and call it
-
Create a
.cppfile in thesrc/mod/featuresdirectory which states the offset to inject your code at, and the code to run.- Let's create a new file
src/mod/features/disobeying.cpp. - At the top of the file, I usually always add this include for feature files:
src/mod/features/disobeying.cpp#include "exlaunch.hpp"- Define a hook to inject code into the wanted function. There are 3 types of hooks in ExLaunch that are detailed here. For our purposes, we'll want a replace hook:
src/mod/features/disobeying.cppHOOK_DEFINE_REPLACE(Dpr_Battle_Logic_MainModule_GetMaxFollowPokeLevel) {
static uint8_t Callback(Dpr::Battle::Logic::MainModule::Object* __this) {
// Setting the obedience threshold to always be Lv. 100.
return 100;
}
};infoHow to properly define the type of the
__thisargument is detailed on the headers page.- Now that the hook is defined, you can install it at the offset where the original function is that we found earlier (
020349e0). Add the following definition ofexl_disobeying_mainto the bottom of the file:
src/mod/features/disobeying.cppvoid exl_disobeying_main() {
Dpr_Battle_Logic_MainModule_GetMaxFollowPokeLevel::InstallAtOffset(0x020349e0);
} - Let's create a new file
-
Build your mod as above.
-
Install and test your new mod on your target platform.
Next Steps
To accomplish mods that are more complicated you'll need to learn more about AARCH64 opcodes and C++. If you want to access internal functions, you will need to add their offset when defining them as externals. More info on that on the headers page. When you run into issues, logging and debugging are useful tools to help resolve them.
Check the side bar for more info on these topics.